0. 이 글의 목적
ElasticSearch8.9를 공식 문서를 토대로 설치하는 과정을 정리하기 위함
1. ElasticSearch 설치 환경
MacOS
Docker
iTerm
2. 설치 시작
https://www.elastic.co/guide/en/elasticsearch/reference/current/docker.html
Install Elasticsearch with Docker | Elasticsearch Guide [8.9] | Elastic
The container runs Elasticsearch as user elasticsearch using uid:gid 1000:0. Bind mounted host directories and files must be accessible by this user, and the data and log directories must be writable by this user.
www.elastic.co
상남자 특 : 최신 버전으로 함

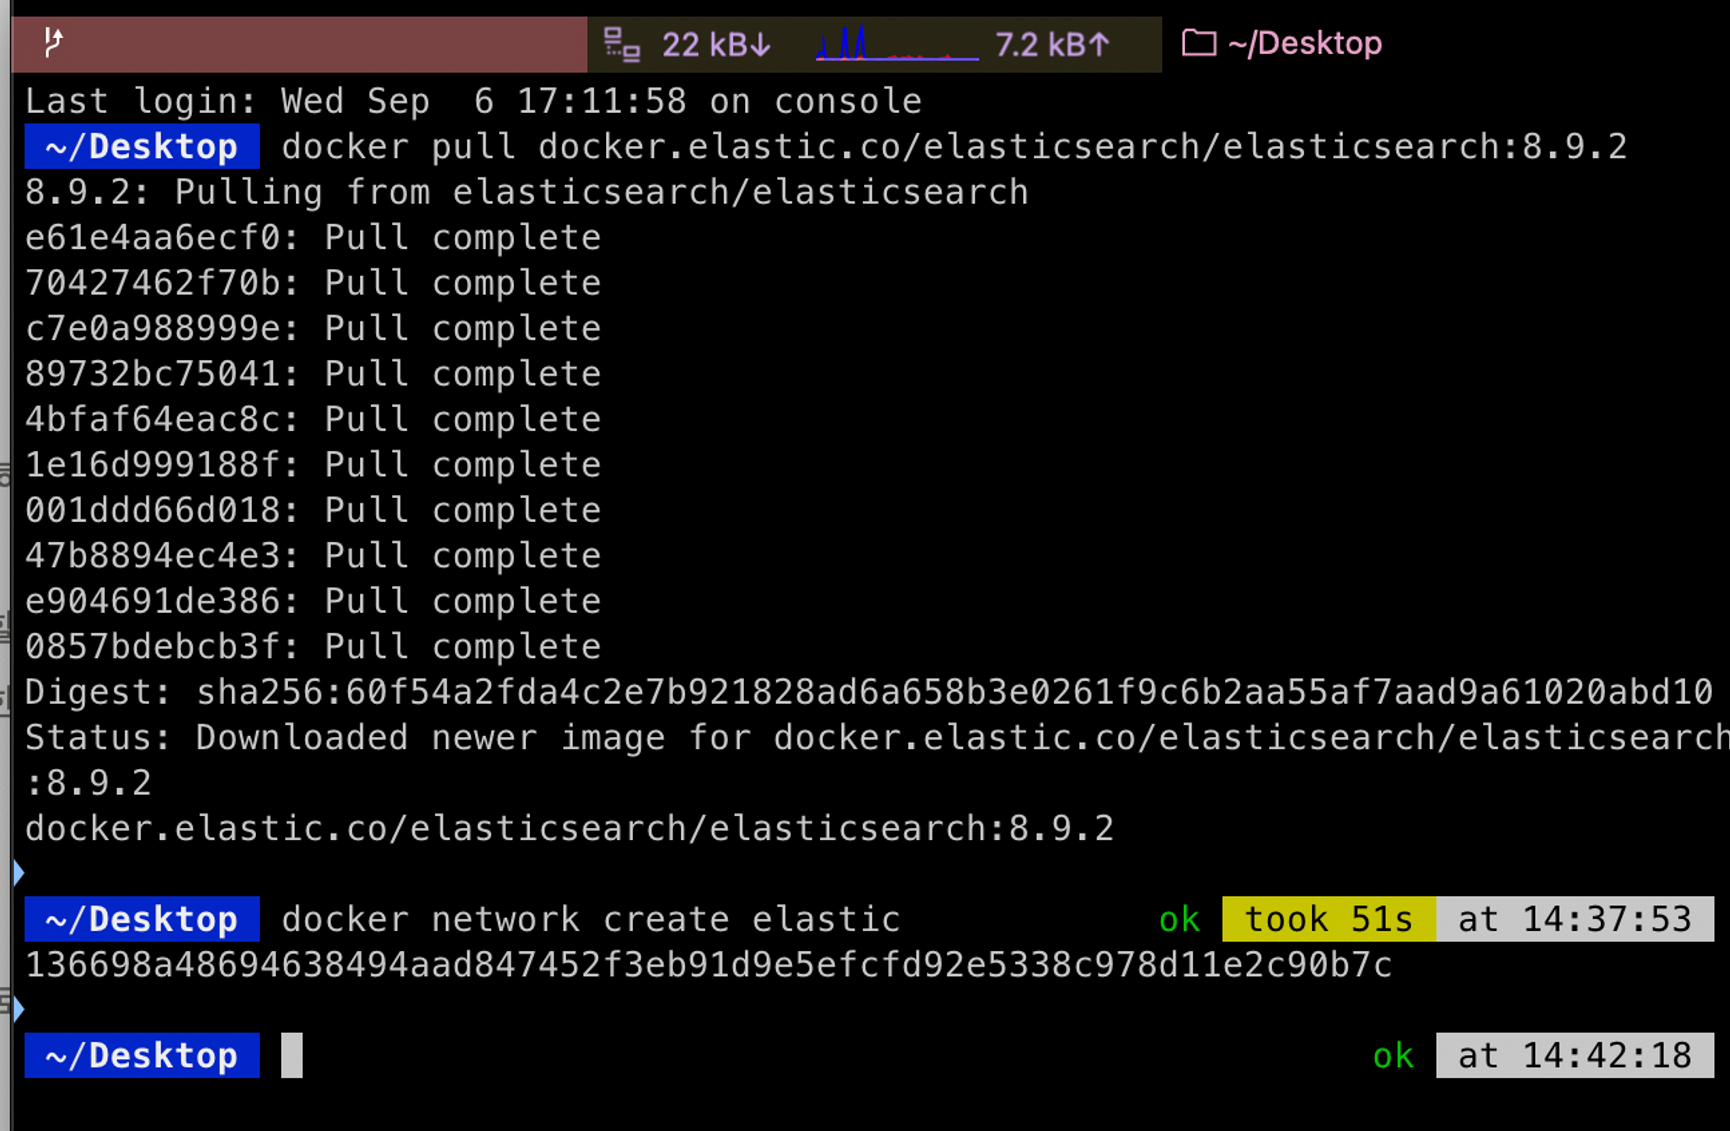
docker pull docker.elastic.co/elasticsearch/elasticsearch:8.9.2

공식 문서에서 보면 새로운 네트워크를 생성해서 진행을 한다. 새로운 네트워크를 생성하거나 하지 않아도 단순 실행에서는 별 차이가 없을 것 같은데 여기서는 최대한 공식 문서를 기반으로 따라가도록 한다.
docker network create elastic
docker의 network create 옵션을 통해 새로운 네트워크를 생성할 수 있다. 이 경우 elastic이라는 이름으로 network가 생성된다.

현재 내가 생성한 네트워크들은 아래 명령어로 확인이 가능하다.
docker network ls
pull로 가져온 elasticsearch의 이미지로 컨테이너를 생성해 보자.
docker run --name es01 --net elastic -p 9200:9200 -itd -m 1GB docker.elastic.co/elasticsearch/elasticsearch:8.9.2
도커를 모를 수 있어 옵션에 대해 그때그때 간략하게 설명을 하며 넘어가도록 하겠다.
--name옵션은 컨테이너의 이름을 es01로 지정한다.
--net옵션은 우리가 위에서 생성한 네트워크(elastic)를 지정하는 부분이다.
-p옵션은 포트를 지정한다. 형식은 {외부 포트}:{컨테이너 내부 포트}이다.
공식문서에 있는 -it는 복합옵션이다. -i와 -t옵션을 합친 것으로
-i는 --interactive 옵션으로 컨테이너의 표준 입력을 열고 대화형으로 유지한다.
-t옵션은 --tty로 가상 터미널을 할당하여 컨테이너 내부에 직접 명령어를 입력할 수 있도록 하는 옵션이다.
즉 -it는 docker 컨테이너를 대화형 모드로 실행할 수 있게 해주는 옵션이다. 여기에 나는 -d옵션을 추가해서 사용할 것이다.
-d는 --detach로 도커 컨테이너를 백그라운드로 실행하도록 한다. 이 옵션을 실행하지 않으면 바로 도커 컨테이너 터미널(elasticsearch)로 전환되겠지만 이 옵션을 통해 백그라운드 실행으로 돌리고 다른 작업을 할 수 있다.
-m옵션은 컨테이너에 메모리를 할당하는 옵션이다.
이제 맨 뒤에 우리가 가져온 이미지 이름을 넣으면 컨테이너가 생성되고 실행된다.

이 명령어를 통해 현재 실행 중인 컨테이너들의 상태를 확인할 수 있다.
docker ps

이제 아래 명령어를 실행하면 초기화를 진행하며 enrollment token이 나온다. 최초 실행 시에만 나오기 때문에 잘 저장해 두자.
docker exec -it es01 /usr/share/elasticsearch/bin/elasticsearch-reset-password
docker exec -it es01 /usr/share/elasticsearch/bin/elasticsearch-create-enrollment-token -s kibana

공식문서에서 좋은 가이드라인을 제시해주고 있다. 환경 변수로 export 하자.

환경변수가 제대로 나갔는지에 대해서는 echo 명령어로 확인이 가능하다.
echo $ELASTIC_PASSWORD
이제 container의 SSL 인증 파일을 HOST로 가져오겠다.
docker cp es01:/usr/share/elasticsearch/config/certs/http_ca.crt .
docker cp명령어는 컨테이너↔호스트 간 양방향 파일 복사를 지원한다.
위에서는 es01컨테이너의/usr/share/elasticsearch/config/certs/http_ca.crt 파일을 현재 위치로 복사한다.
docker cp {container name}:{container file path} {host path}

—cacert옵션으로 컨테이너에서 가져온 certificate 파일을 등록하여 모든 REST API통신 시 등록하도록 하겠다.
curl --cacert http_ca.crt -u elastic:$ELASTIC_PASSWORD https://localhost:9200

에러가 발생한다.
curl -k -v --cacert ./http_ca.crt -u elastic:$ELASTIC_PASSWORD https://localhost:9200
안되는데.. 그냥 https 안 해도 괜찮지 않을까..
~/Desktop/toy/elasticsearch curl -k -v --cacert ./http_ca.crt -u elastic:$ELASTIC_PASSWORD https://localhost:9200 ok at 15:23:21 * Trying 127.0.0.1:9200... * Connected to localhost (127.0.0.1) port 9200 (#0) * ALPN: offers h2 * ALPN: offers http/1.1 * (304) (OUT), TLS handshake, Client hello (1): * (304) (IN), TLS handshake, Server hello (2): * (304) (IN), TLS handshake, Unknown (8): * (304) (IN), TLS handshake, Certificate (11): * (304) (IN), TLS handshake, CERT verify (15): * (304) (IN), TLS handshake, Finished (20): * (304) (OUT), TLS handshake, Finished (20): * SSL connection using TLSv1.3 / AEAD-AES256-GCM-SHA384 * ALPN: server did not agree on a protocol. Uses default. * Server certificate: * subject: CN=de63c6ac1459 * start date: Sep 7 05:59:06 2023 GMT * expire date: Sep 6 05:59:06 2025 GMT * issuer: CN=Elasticsearch security auto-configuration HTTP CA * SSL certificate verify result: self signed certificate in certificate chain (19), continuing anyway. * Server auth using Basic with user 'elastic' > GET / HTTP/1.1 > Host: localhost:9200 > Authorization: Basic ZWxhc3RpYzpleUoyWlhJaU9pSTRMamt1TWlJc0ltRmtjaUk2V3lJeE56SXVNVGd1TUM0eU9qa3lNREFpWFN3aVptZHlJam9pTnpWbE5UQXhPV1prT1dSa1l6UXpaakkzWVRaaU0yVXpaV1UwWldaa01UUmtNREV6T0RCaE9HVXhaVFF5TVRFNVltWTVaRFV3WkRka09UZzVOREJtTUNJc0ltdGxlU0k2SWt4WE1EbGliMjlDVVhoVFMwOVpiR0V5VDBRNE9tWkpPVzVhTkRJM1VtMXBORVpzYTBSell6VmhNVUVpZlE9PQ== > User-Agent: curl/7.86.0 > Accept: */* > * Mark bundle as not supporting multiuse < HTTP/1.1 401 Unauthorized * Authentication problem. Ignoring this. < WWW-Authenticate: Basic realm="security" charset="UTF-8" < WWW-Authenticate: Bearer realm="security" < WWW-Authenticate: ApiKey < content-type: application/json < content-length: 465 < * Connection #0 to host localhost left intact {"error":{"root_cause":[{"type":"security_exception","reason":"unable to authenticate user [elastic] for REST request [/]","header":{"WWW-Authenticate":["Basic realm=\"security\" charset=\"UTF-8\"","Bearer realm=\"security\"","ApiKey"]}}],"type":"security_exception","reason":"unable to authenticate user [elastic] for REST request [/]","header":{"WWW-Authenticate":["Basic realm=\"security\" charset=\"UTF-8\"","Bearer realm=\"security\"","ApiKey"]}},"status":401}%
당장은 어떻게 해결해야 할지 모르겠다.

인공지능을 믿어보자.
로봇이 나보다 똑똑하지 않을까 하는 생각으로 우선 여기까지만 잘 기록해 두고 다음 단계로 넘어가도록 하자.
일단 혹시 모르니 다 disable처리로 간다.
elasticsearch.yml 안에 있는 security관련 설정을 다 disable처리해 주었다.
경로 : $home/config/elasticsearch.yml


이후 터미널을 하나 더 오픈해서 헬스 체크를 진행하였더니 정상적으로 서비스가 떠있는 것을 확인했다.

'ELK' 카테고리의 다른 글
| Elasticsearch8.0 버전 이상을 기준으로 데이터 구조 (0) | 2023.09.09 |
|---|
